Title
HTML5 Audio Player
Introduction
In this post we will see how you can create your own HTML5 Audio Player. Many of you faced with the task of creating audio player at least once in your life. Quite often , you simply choose one of the available players, often it was the flash player. However, you may have already noticed, that these flash players do not work properly on mobile devices (iPhone / Android). Today I am going to tell you about how to create your own basic audio player (using HTML5 technology).
In this example we will use basic <audio> element of HTML5 and will modify it using JavaScript.
<!DOCTYPE html>
<html xmlns="http://www.w3.org/1999/xhtml">
<head>
<title>HTML5 Audio Player</title>
<script src="scripts/jquery.js"></script>

<link href="css/StyleSheet.css" rel="stylesheet" />
</head>
<body>
<div>
</div>
<table>
<tr>

<td colspan="3">
<progress id="seekbar" value="0" max="1"></progress>
<!-- Progress Bar Percentage -->

<!-- End -->
</td>
<td>
<span id="progPer"></span>
</td>
</tr>
<tr>
<td>
<img src="images/volume_down.jpg" height="30" width="30" onclick="voldown()" />
</td>
<td>
<img src="images/play.jpg" width="50" height="50" id="img1" onclick="playOrPause()" />
</td>
<td>
<img src="images/volume_up.png" height="30" width="30" onclick="volup()" />
</td>
</tr>
</table>

<audio id="audio1" src="songs/sample.mp3" onended="res()" ontimeupdate="updateProgress()">
Error! Your Browser is outdated. Please use the latest version!
</audio>

<!-- Volume up down -->
<table>
<tr>
<td>

</td>
<td>

</td>
</tr>
</table>
<!-- End -->
<script src="scripts/script.js"></script>
<div>
</div>
</body>
</html>
If you see in above code we have used basic <audio> tag of HTML5 and performed some operations over it using JavaScript.
var myAudio = document.getElementById("audio1");
function playOrPause() {

if (myAudio.paused) {
myAudio.play();
img1.src = "images/pause.jpg";
}
else {
myAudio.pause();
img1.src = "images/play.jpg";
}
}

function res() {
img1.src = "images/play.jpg"

}
function updateProgress() {
$('#audio1').on('timeupdate', function () {
$('#seekbar').attr("value", this.currentTime / this.duration);
});

document.getElementById('progPer').innerHTML = (seekbar.value * 100).toFixed(0) + "%";
}

function voldown() {
myAudio.volume -= 0.1;
}

function volup() {
myAudio.volume += 0.1;
}
Now lets see how this code works. If you see in HTML5 code we have used <audio> tag with various function calls.
<audio id="audio1" src="songs/sample.mp3" onended="res()" ontimeupdate="updateProgress()">
Error! Your Browser is outdated. Please use the latest version!
</audio>
Here
src="songs/sample.mp3"
holds the location of mp3 file location, and we have various function calls as well:
onended=”res()”, this event will be triggered when mp3 file is played completely and res() function will be called.
function res() {
img1.src = "images/play.jpg"

}
This JavaScript function contains the definition which will reset the player image.
ontimeupdate=”updateProgress()”, this event will triggered every moment during mp3 file is played and every moment function updateProgress() is called.
function updateProgress() {
$('#audio1').on('timeupdate', function () {
$('#seekbar').attr("value", this.currentTime / this.duration);
});

document.getElementById('progPer').innerHTML = (seekbar.value * 100).toFixed(0) + "%";
}
This function contains the code definition which will update the current time duration of the mp3 file and will append with the progress bar to show the complete percentage.

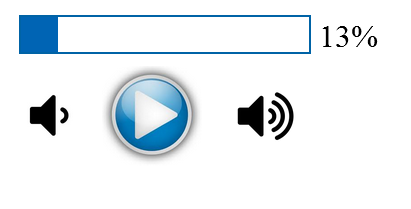
We have a progress bar, see below code.
<progress id="seekbar" value="0" max="1"></progress>
<!-- Progress Bar Percentage -->

<!-- End -->

<span id="progPer"></span>
The above HTML code and JavaScript function is responsible to make this progress bar work.
Note: Their is predefined tag <progress> available in HTML5
Now lets see how we are controlling play/pause, volume up – down operations.
<tr>
<td>
<!-- To reduce volume -->
<img src="images/volume_down.jpg" height="30" width="30" onclick="voldown()" />
</td>
<td>
<!-- To play/pause song -->
<img src="images/play.jpg" width="50" height="50" id="img1" onclick="playOrPause()" />
</td>
<td>
<!-- To increase volume -->
<img src="images/volume_up.png" height="30" width="30" onclick="volup()" />
</td>
</tr>
Here we have used images as buttons to call events, in order to perform play/pause, volume up – down operations.
I’ve made JavaScript functions to control these operations. Let’s have a look.
var myAudio = document.getElementById("audio1");

// To control play and pause

function playOrPause() {

if (myAudio.paused) {
myAudio.play();
img1.src = "images/pause.jpg";
}
else {
myAudio.pause();
img1.src = "images/play.jpg";
}
}

// To reduce volume

function voldown() {
myAudio.volume -= 0.1;
}

// To increase volume

function volup() {
myAudio.volume += 0.1;
}
Below is the CSS code for progress bar.
body {
}
progress {
color: #0063a6;
font-size: .6em;
line-height: 1.5em;
text-indent: .5em;
width: 15em;
height: 1.8em;
border: 1px solid #0063a6;
background: #fff;
}
You can check demo player by visiting below link
HTML5 Music Player By Paras Babbar
